Overview
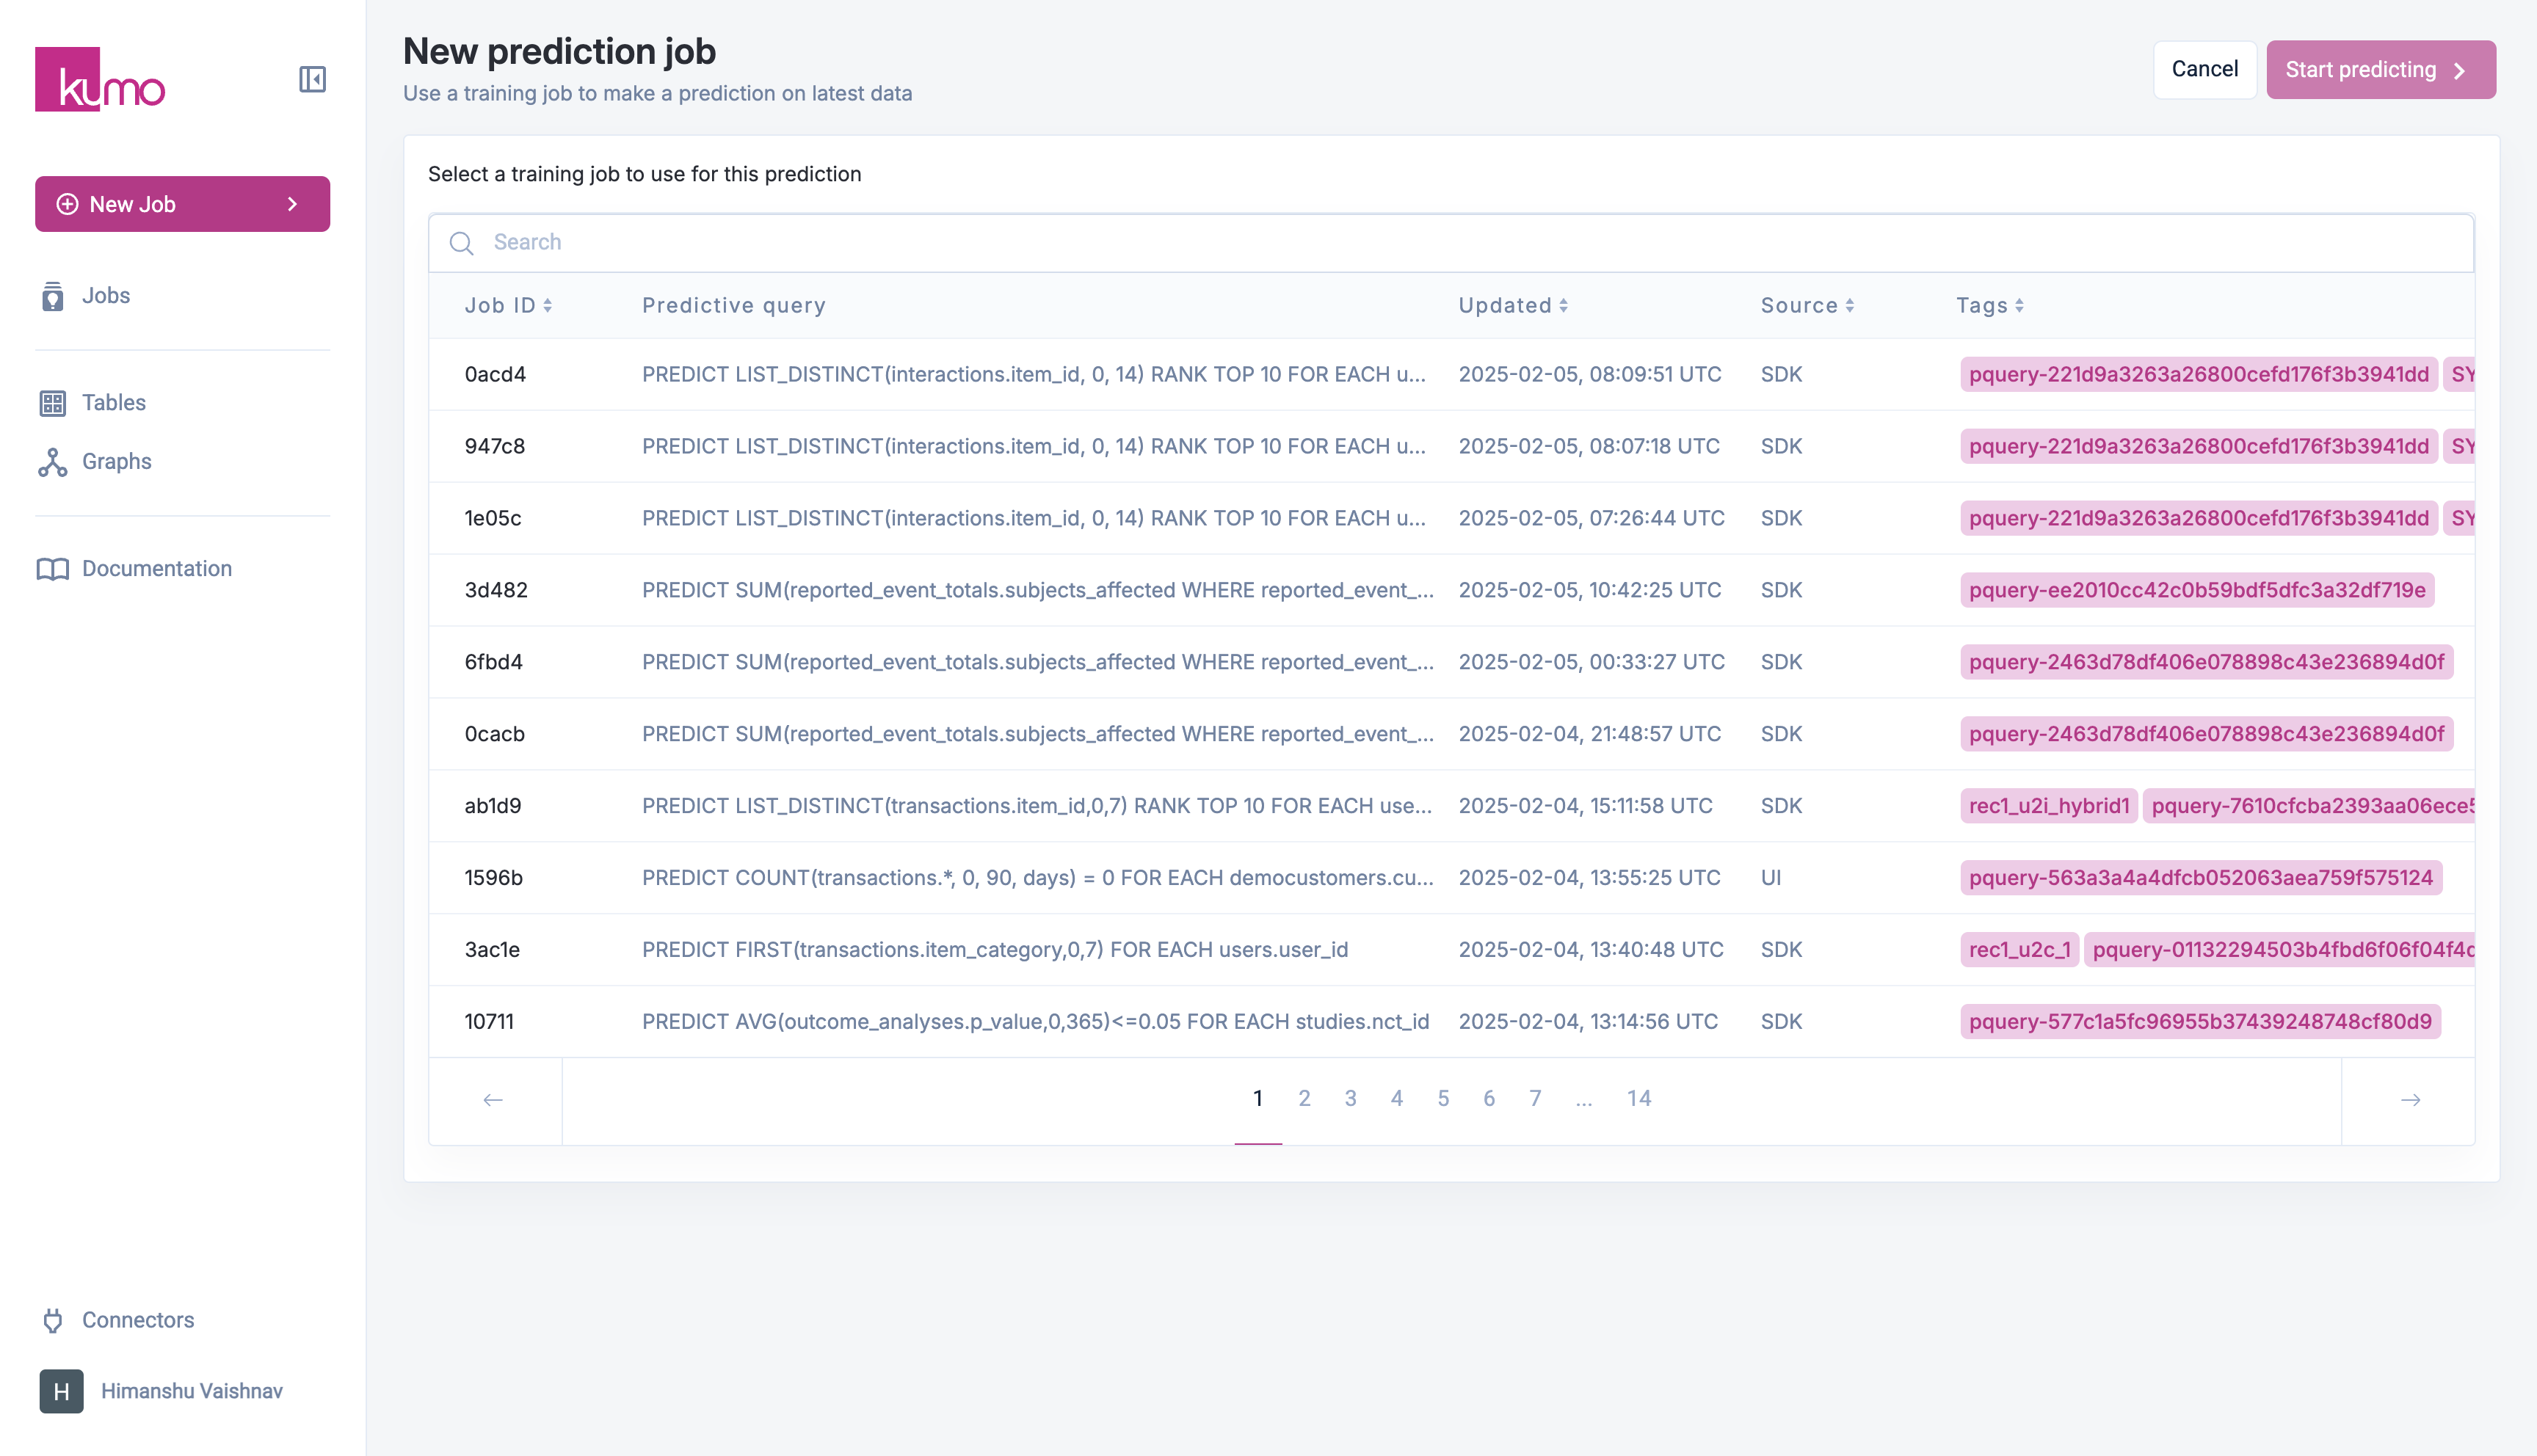
Once you are satisfied with the performance of your predictive query on historical data, you can generate batch predictions. This is done by navigating to New > Prediction and selecting a model to run.Creating a New Batch Prediction
To run batch predictions:- Navigate to New > Prediction.
- Select a trained predictive model.
- (Optional) Adjust predictive query filters to apply target entity filtering.
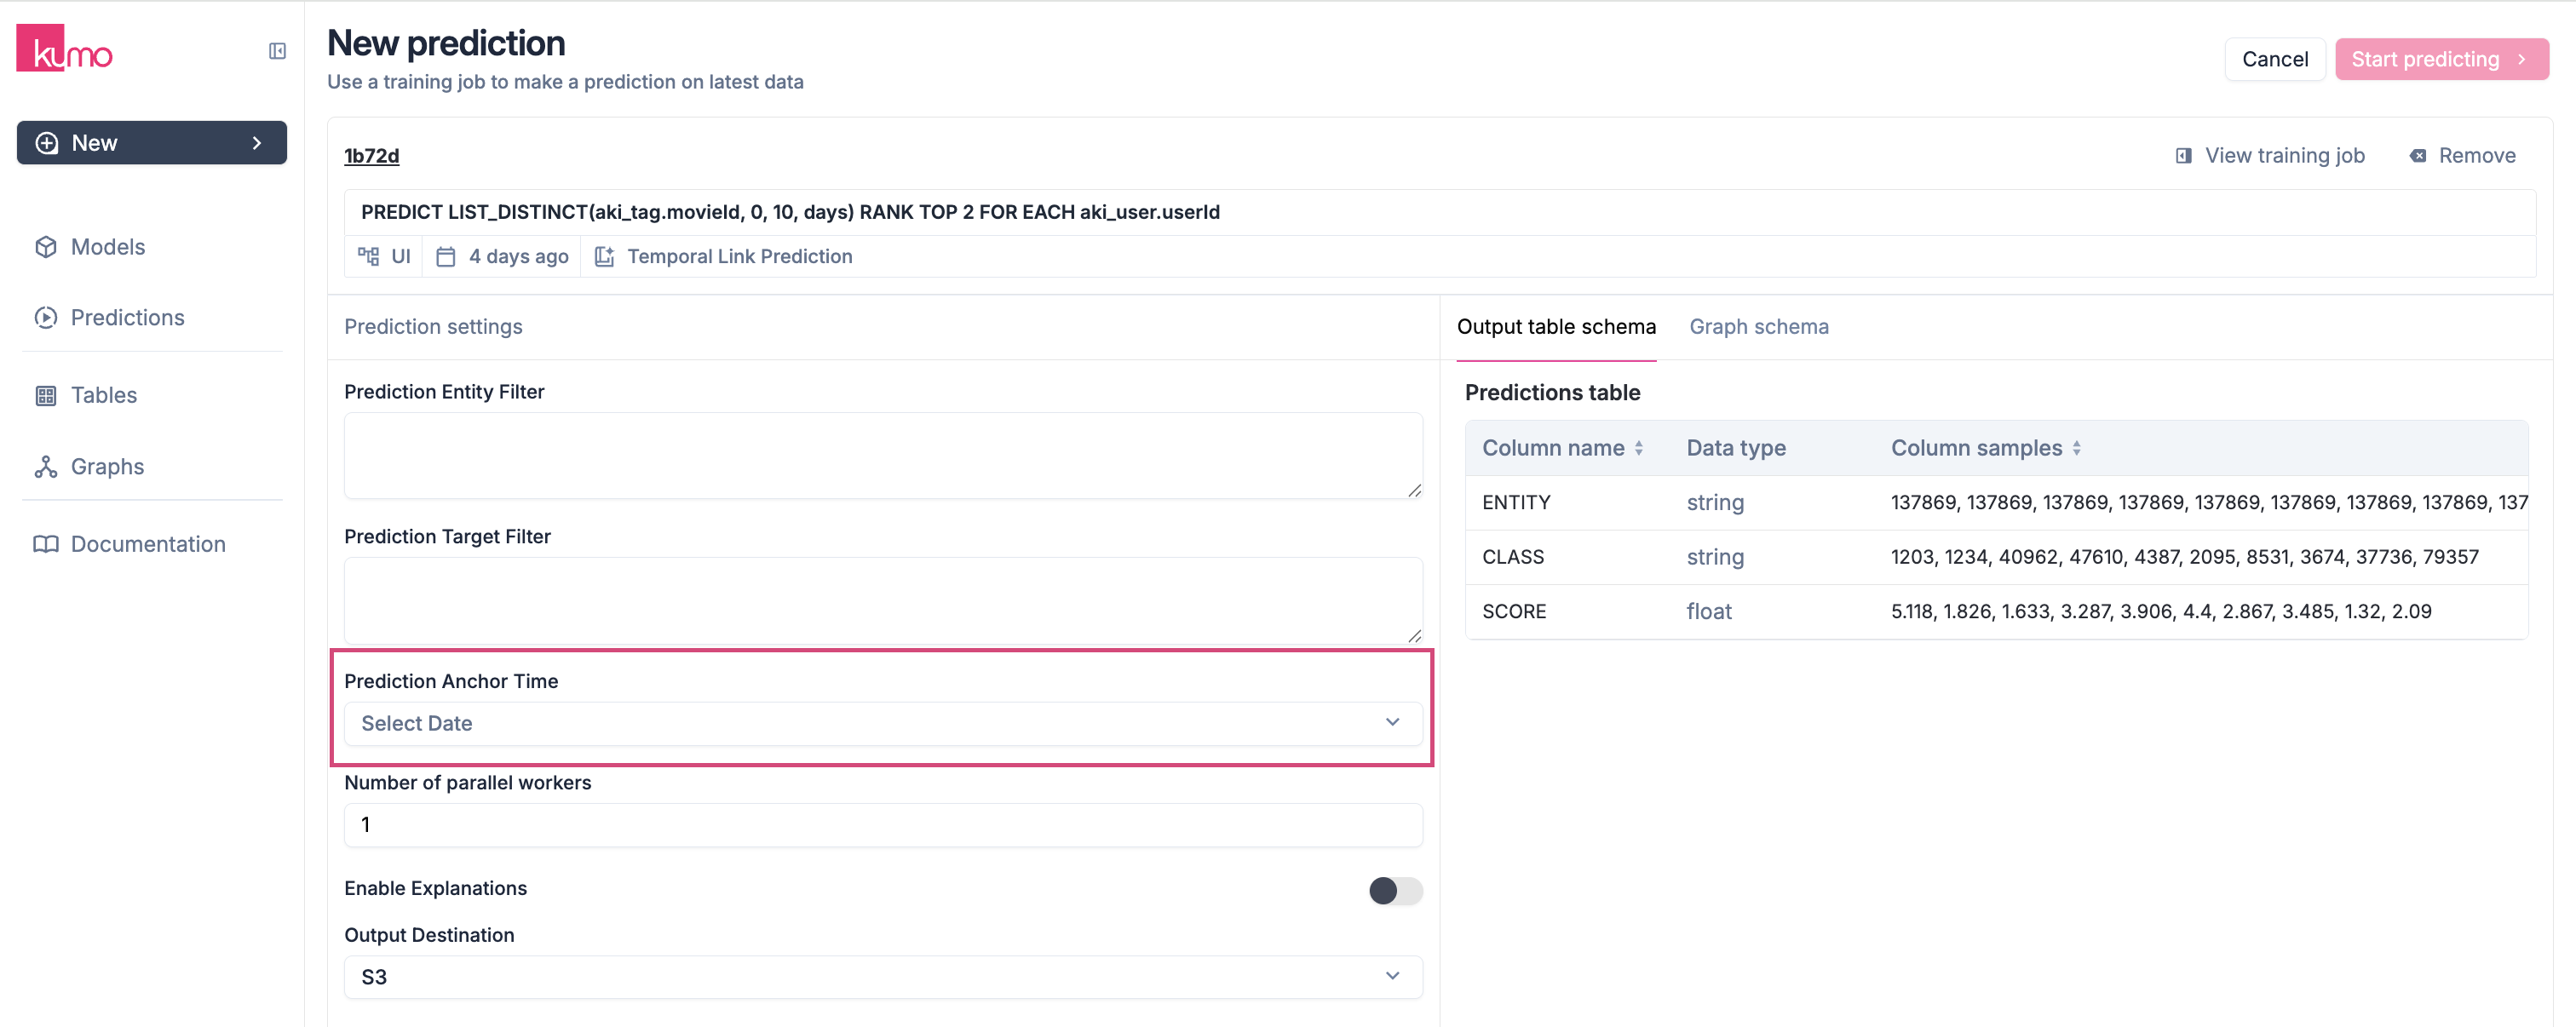
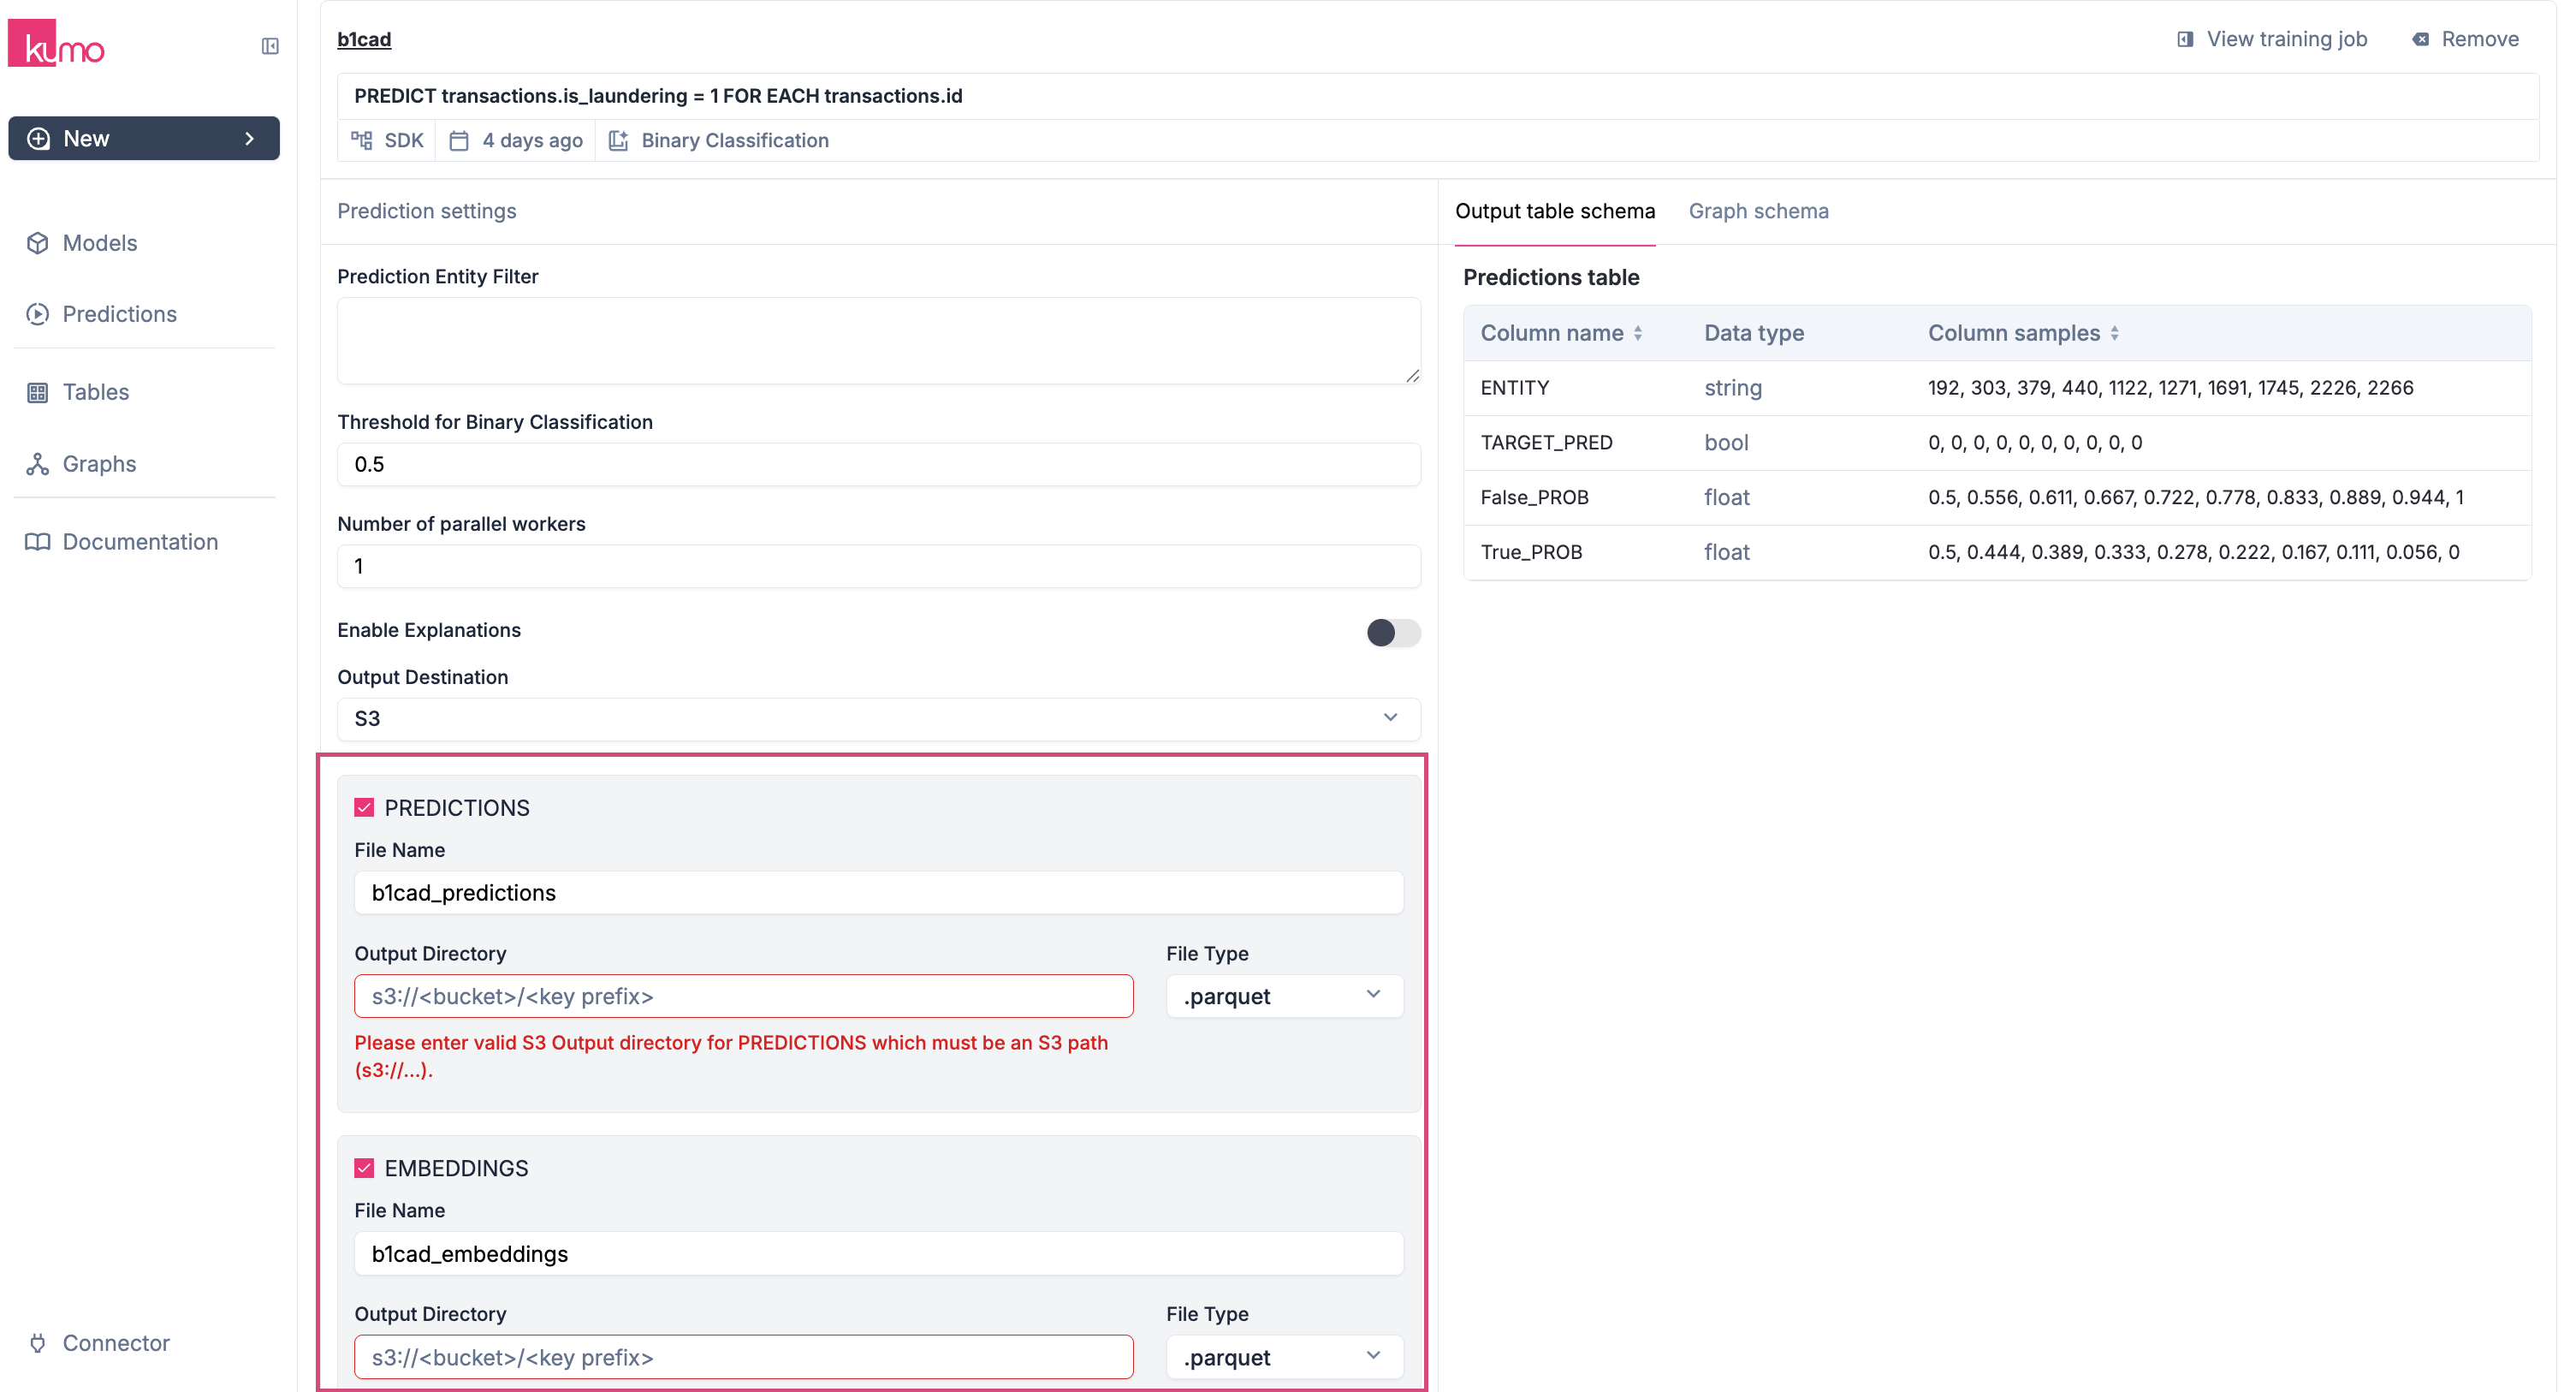
- Configure batch prediction settings (anchor time, output destination, etc.).
- Submit the batch prediction job.
Existing Batch Prediction Jobs
To view the details for an existing batch prediction jobs, click on the batch prediction job on “Predictions” page. You can view the details of each job by clicking on the job ID in the “Batch Prediction Job Id” column.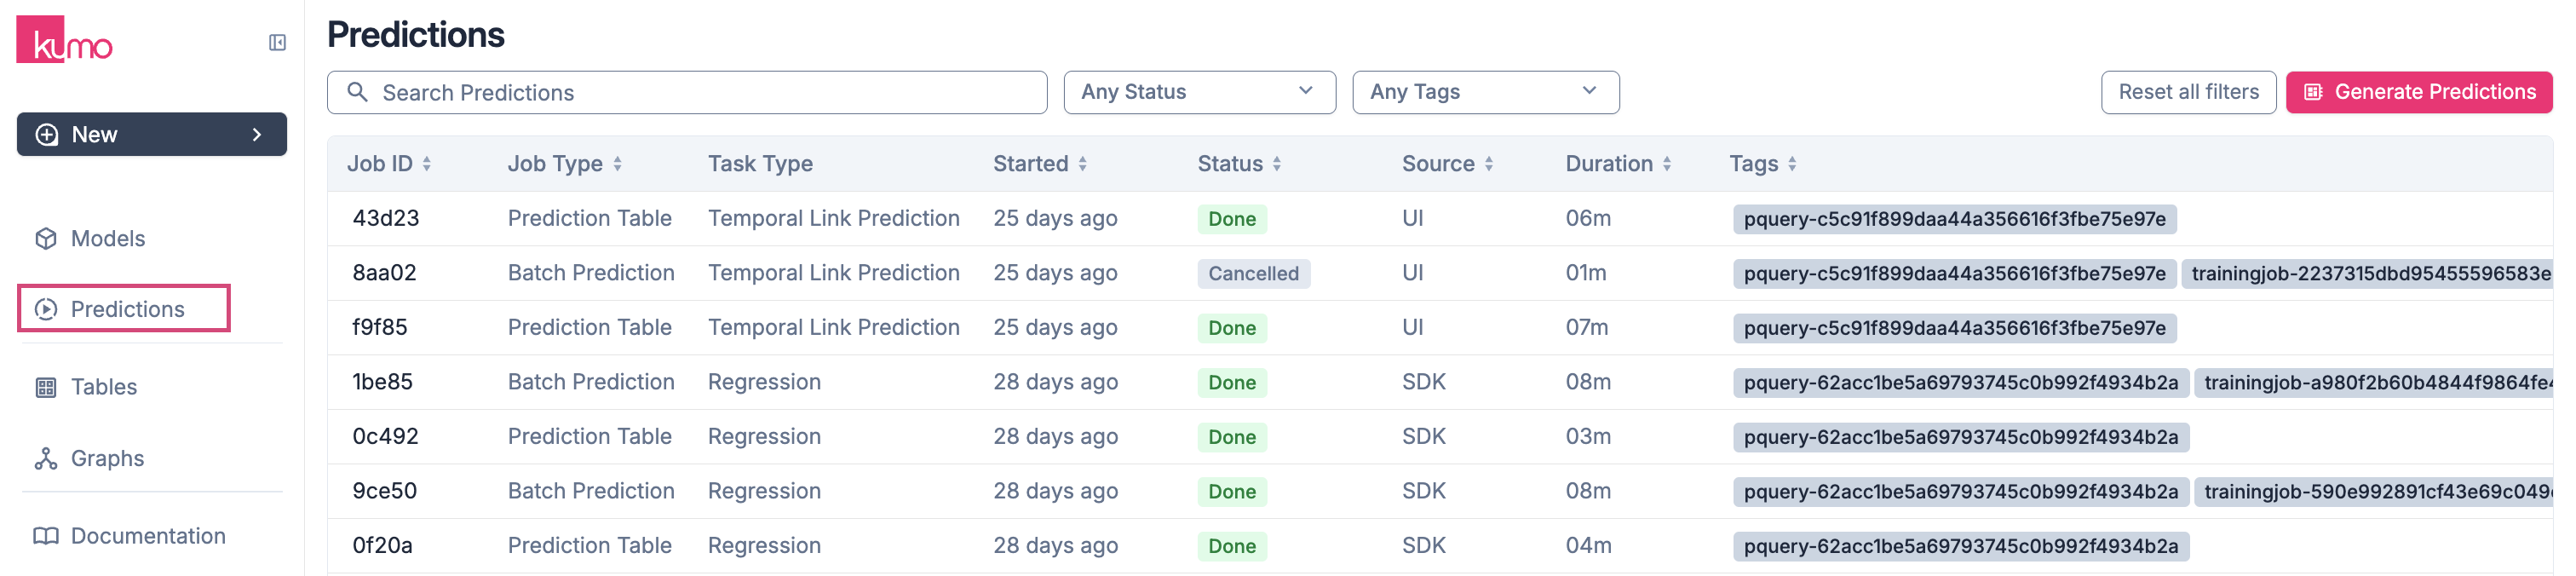
Configuring Batch Prediction Settings
Applying Filters at Prediction Time
After training, you may want predictions for a specific subset of entities. Kumo allows you to:-
Filter target entities by refining the dataset used for batch predictions.
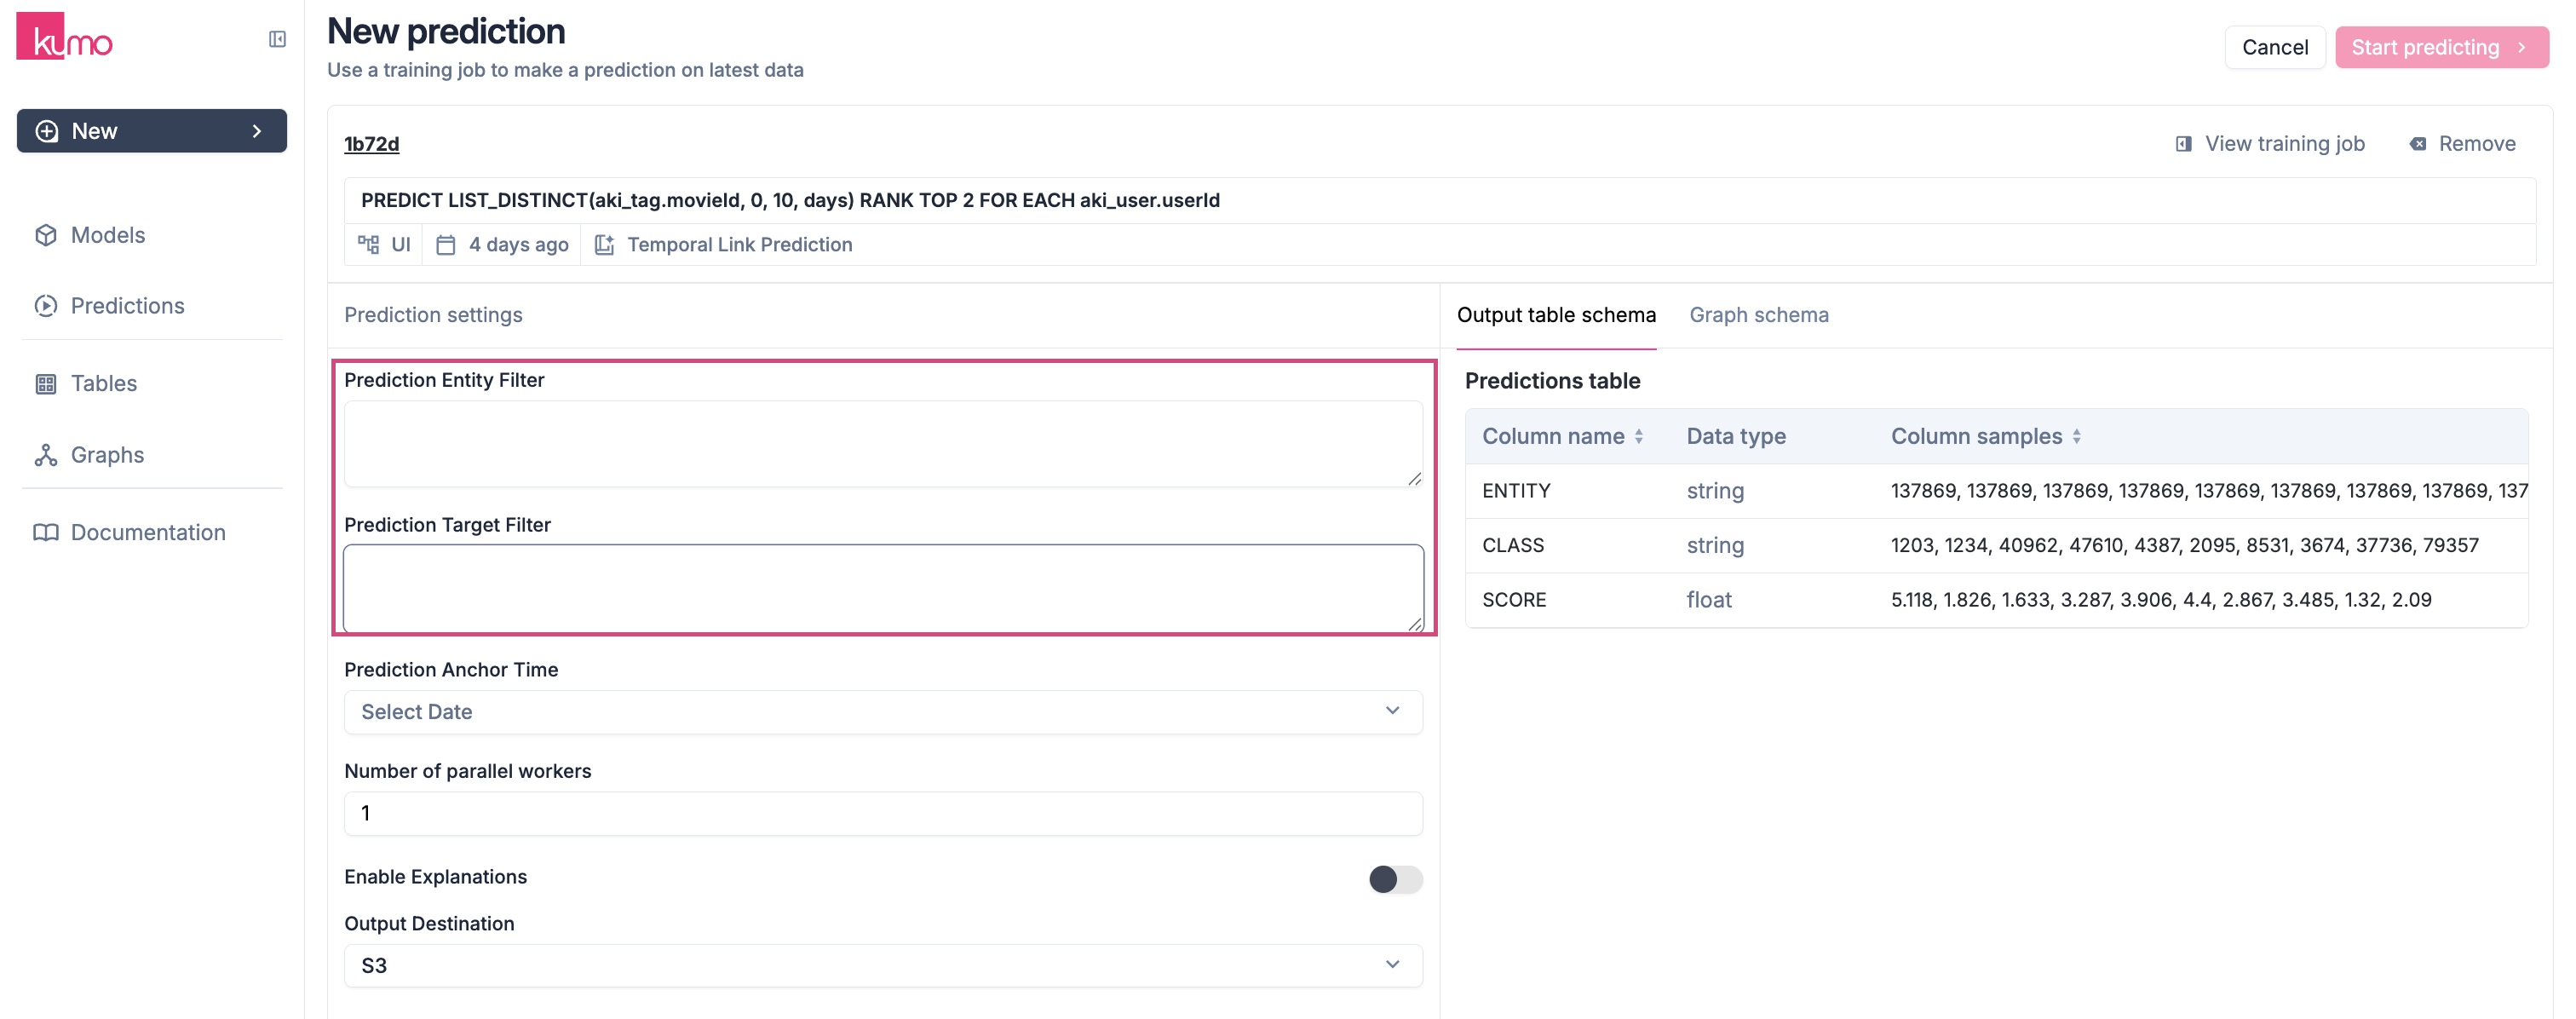
- Improve efficiency by reducing the amount of data processed.
- Streamline output by limiting predictions to relevant business logic.
PQL
PQL
PQL
Prediction Anchor time
- Set an optional prediction anchor time in ISO 8601 format (e.g.,
2024-02-27). If left blank, Kumo defaults to the latest timestamp in the fact table.
Setting Per Prediction Type
You’ll also need to specify some additional settings per your prediction type. For example, a binary classification task will require setting a threshold (e.g., 0.5) for determining the point at which an object is considered part of the target class.
Your editable options (e.g., Threshold for Binary Classification) will depend on the type of prediction task at hand.
\
Output Destination Specify where predictions should be stored. Available destinations:- AWS S3 (CSV, Parquet, or partitioned Parquet format)
-
Snowflake (overwrites existing table rows)
Note: The user account that you used to create the Snowflake connector must have permissions to create tables in Snowflake.
-
BigQuery (appends predictions to an existing table)
Note: The user account that you used to create the BigQuery connector must have permissions to create tables in your BigQuery data warehouse.
-
Local Download (sample output up to 1GB)

Parallel Processing
Specify the number of parallel workers (up to 4) to speed up batch predictions for large datasets.Output Type
Choose the type of output:- Predictions - The predicted target values for the selected entities.
-
Embeddings - Numerical vectors of entities capturing their behavioral patterns.
You can later download a sample batch prediction output—even if you choose to write predictions to another data source. You can choose to output both predictions and embeddings.